Monday, June 15, 2015

Tweaking My Painting Box

I'm always changing my painting gear attempting to come up with the perfect setup for me. Although I have to admit, the designing and building is sometimes more fun than actually painting on the stuff! HA!  Last week I'd made the new hanging box, hoping to use it for more mixing room, but I realized it would work best for just a shelf for "stuff". Why not get a bigger painting setup? Because I am trying to get this smaller gear perfected to fit into luggage for plane travel. My small painting box has traveled with me all over the US and worked well, but needed just a few tweaks.

I have numerous painting setups (smaller and larger) but I prefer this small one. It is an EasyL Prochade by Artwork Essentials. It's too small for most people as you can only paint on a canvas from 6" - 10" tall. But 8x10 is a good size for me painting outside in the short amount of time we have to paint before the light changes.

Before
The original setup of this box was made for right handed people with a left side extension. I had drilled holes in this to hold my paint brushes, but since I am left handed, they were in the way.  I decided to put a thin piece of plywood over the extension to cover the holes so I could use it for extra mixing surface. I then made brush holder for the right side.
backside of original left extension
left extension with thin plywood added, mounted on box
Then I took a smaller piece of plywood and added a small square dowel which will be held on the right side of the box with micro clamps. I drilled holes for the brushes later:

Here's the final setup, ready to paint! The lower hanging box is great to lay down "stuff". All of this fits nicely into my rolling backpack. Hopefully this will work well this summer. But who knows, I may come up with another project!


Saturday, June 13, 2015

Saturday Plein Air - Glick Park

I've missed posting for a couple weeks for various reasons. This week we painted near the Columbus Zoo at the O'Shaughnessy dam across the Scioto river. There's a nice little park there overlooking the water and dam.


Today I wanted to work on my color mixing and wasn't too concerned about a pretty composition. I also was trying out a new hanging accessory for more mixing space. I made the lower wooden box this week. It was difficult to use for mixing though, because of the angle and depth, so will use this new one for holding stuff like my palette knife and mineral spirits, etc.

I plan a different idea for the left hand tray on the upper box. Because I am left handed, the tray on the left on the top box is in my way when I put my paint brushes in the holes. I think I will build one for the right side, and also remake the left tray to use for extra mixing space.


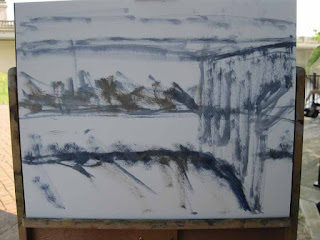
Process shots of today's painting:


"Under the Dam", 6x10, Multimedia board coated with gesso


Monday, June 01, 2015

Sunday Sewing??

I didn't paint last Saturday with the plein air group because I had to deliver "Checkmate" to the Zanesville Museum of Art. Saw many of the other entries - WOW - it's going to be another exceptional show! Can't wait to visit the show once it is hung. (June 11- August 21st)

Instead of painting, I decided to get out my sewing machine, which has been neglected for about 10 years now. I was previously heavily into the "art quilt" movement for a good 15 years. Once I moved to Columbus I decided to switch to painting. I'd thought it would be easier to sell paintings. (HA!)

I'd been seeing some really interesting aprons online lately and decided to draft out a pattern for one I liked which is based on Japanese work aprons with crossed straps instead of ties. Luckily, my draft worked perfectly for my build (ie: wide and tall, lol) and fit like a glove.(The patterns available online fit normal size people, so had to make my own) After I sewed it yesterday, I agreed with the prices I saw for these on Etsy! It would be hard for me to make these for any less.

I'll use mine for use while painting. There's one other style I need to try and found some great fabric in the clearance at Hobby Lobby. I'll get that one sewed soon so I can use my painting table again! I did have to laugh - it all comes around - while digging out my sewing supplies, I found my stash of art quilts.....

Saturday, May 23, 2015

Saturday Plein Air - Glacier Ridge Metro Park

Today's location was Glacier Ridge Metro Park. I was drawn to the stand of trees and decided to zoom in to one. 


"Mighty", 8"x10", oil on gesso board

Monday, May 18, 2015

Mr. PH Goes to Zanesville

I am pleased to announce that my oil painting, "Checkmate" (Mr. Potato Head plays chess) has been accepted into the Zanesville Museum of Art’s 71st Annual Exhibition. Of the 307 works of art entered this year, 67 pieces from 66 artists were accepted.

Show runs from June 11 - August 21, 2015. Awards presented by juror Mary Gray, Director, Ohio Arts Council Riffe Gallery, on June 11 at 7pm.

Saturday, May 16, 2015

Saturday Plein Air - Troyer's Bakery

We are asked each year to paint at the farm of Troyer's bakery outside of Danville Ohio each year on the day of their open house. I was disappointed as I drove the hour and a half ride, as it was pouring rain the whole way. I figured if it was too wet to paint, that I'd at least buy some maple syrup or baked goods before heading home.

But I was happy to see the rain stop as soon as I arrived and a handful of painters hunkered under their umbrellas. I walked around looking for a subject. I found the bright blue tractor at the barn. I don't usually paint equipment, but am trying to expand my painting subjects.


 I got started and found my proportions were off and wiped off the panel. That left a nice abstract pattern on my board.


A few more process shots:


I really fought with that yellow front loader. I wanted to just create a muted background of shapes. I got to the stage below and decided it wasn't working, so mushed it all together and made it just look like it was barn siding.
I ended up with the below painting, which I am pretty happy with. There is a lot of glare from the wet paint on the barn siding, but hopefully once it dries a bit, it will recede a bit more.
"Blue Ford", 8x10 oil on gesso board

Saturday, May 09, 2015

Saturday Plein Air - Gambier

Today we painted on the grounds of the Brown Family Environmental Center near Gambier. BFEC is part of Kenyon college: http://www.kenyon.edu/directories/offices-services/brown-family-environmental-center/

There were many interesting views, but I was taken with the odd little shed by the old maple trees. When we arrived, there were nice shadows on the shed. This is a very strange shaped shed. The corner to the right was rounded. I picked a straight-on view, which probably wasn't the best way to convey the shape.

By the time I got set up, the sky turned overcast, so I had to wing it. I worked in pastel on 500 grit UArt. Process shots following:


Quirky Cabin, 8 x12, pastel on 500 grit UArt


Saturday, May 02, 2015

Easel for Painting Panels, My Hack

Again, I was inspired to finish the easel attachment for the folding hanging painting palette that I constructed last June:  http://nartizt.blogspot.com/2014/06/more-tinker-time-folding-hanging.html

I had attempted to make the easel part a couple other times, but the issue always was how to attach it to the tripod. I knew what I needed, but I hated to order a 79 cent part online. Finally I found what I needed at Menards - 1/4"-20 x 1/4" Brad Hole Tee Nuts. I've used these in a couple of my other pochade hacks earlier this year/late last year. When my friend Julie was emailing me about the easel she was constructing I had to get mine finished too.

I created mine with parts I already had and only had to buy the threaded tee nut. I have several of these inexpensive wooden table easels:
 I took it apart and realized I needed to put a couple of the legs back on because I needed something to use as spacers for the lower ledge so that the adjustable top bracket could slide in the grooves. These were the exact thickness I needed, and they already had holes drilled.

 I hacked them off. Later, I would be replacing these original screws with some that were 1 1/2" long to go through and attach the bottom ledge from behind.

Here you can see the 1 1/2" screws in black which go through the back block, the spacers and into the bottom ledge. The bottom ledge is one half of the folding lower ledge of the original easel. The knurled brass nut is the original nut to secure the sliding upper bracket bar.
 Here's a couple views from the side:


Shown adjusted to the largest space above, which will hold up to a 12" panel, and below shown shortened.
Here it is attached to my tripod quick connect hardware with an 8x10 panel.


 I took it out in the field today, and although it worked pretty well, it still needed tweaking. Because this tee nut required brads or tiny screws to attach, those raised the quick release plate too high and I couldn't get it tight enough.
I ended up using a couple layers of matboard and some sandpaper formed together with double stick tape to make a platform for the release plate to sit level.

I love to make my own version of the more expensive plein air gear I see online. I figure, it's just going to get messy and covered with paint, so why pay the big bucks?