Saturday, March 29, 2014

Studio Work - River Snag

If you read the last post, you saw a hint of what I was working on. After the experiment with the thinned gesso on the UArt paper, I started on the larger painting. My photo was taken recently along the Scioto river near Hayden Falls. The falls weren't as picturesque as the river that day, but I liked this photo of the river.


I am partial to odd shaped frames so decided to use this photo to paint something to fit a 8x28 frame. Below are process shots. In the photo below on the left, the UArt 400 grit paper has the basic drawing, with the cropped photo to the right of it. The right photo shows the completed painting with the 'mini' trial painting in the middle and the photo on the right side:

Here are four process shots. The left hand view shows the UArt after I have added some of the thinned black gesso in the dark areas, and the thinned white gesso in a few places to brighten up the tan colored UArt. The final painting is on the right.
Here's the finished painting in the frame. There is a bit of glare in the glass.  

Wednesday, March 26, 2014

More Experiments - Adding Acrylics to Sanded Pastel Papers

If you are a pastel painter and enjoy using sanded paper, you are undoubtedly mourning the unavailable Wallis papers. Production issues have caused a worldwide disappearance of this popular paper. Lots of pastel painters love the special edition color of Belgium Mist Wallis. Lots are trying to find a substitution and some are trying to use some type of paint to match this color on other papers.

I am lucky to have a small stash of this paper and I thought I'd try to find a paint to match too. I have several of the "Oops" paint samples from Home Depot and a few of these seem fairly close in value to Belgium Mist but not in color. I attempted to adjust these colors with some tubed acrylic paints, then thinned them with water. I wanted the paint to be thin enough to not affect the grit of the sanded paper. I got 'sorta' close in color and painted on a piece of UArt 400 and a piece of Canson Touch White.

Shown in the photo below, you also see the Belgium Mist and a small piece of Pastelmat dark grey. The Pastelmat is really close but the paper is not sanded (although it is a favorite paper of mine). After the UArt and Canson painted papers dried, I tried out the feel with some hard pastel sticks. I didn't like the texture on the Canson, but the UArt felt pretty nice. I am not sure I would bother to paint a large sheet of UArt this way, but it might be good for smaller paintings. I'm not certain that the exact color is important, but the value of the Belgium Mist is probably what makes it so popular, as it works so well as a background to both dark and light pastel applications.
I was also trying out a sample pastel painting in preparation for a larger piece. I've followed Barbara Benedetti Newton for awhile and have been intrigued by her use of black or white acrylic paint to 'rescue' a failed painting or to prepare a paper with a suggestion of the darks and lights.

Because I wanted to use UArt sanded paper for my next project, and I wanted to underpaint some areas with a dark wash, I decided to try her technique for "scene suggestion". I cut a small (3"x10") piece of UArt in roughly the shape I plan for the larger painting. (I found a thin shaped frame at the thrift shop I wanted to use for a painting.)

I did a quick pencil sketch, fixed that, and then used black and white acrylic gesso thinned down (instead of acrylic tube paint) to paint in the major lights/darks. I setup the painted paper to take a photo and the white ran a bit! But it really didn't matter. I then quickly filled in some of the color with hard pastels. I think this will work quite nicely for the larger piece - you've got a sneak peek to a suggestion of that painting!

Saturday, March 22, 2014

Paintin' with my Peeps at the MAC

I got up early enough today to join my buddies painting at the MAC.


I had a sheet of Pastelmat in the soft warm gray already mounted to go and just took some charcoal pencils and Conte crayons. (The photos don't show the correct color of the paper.) We had a complicated pile of grapes to paint today. It was tough trying to find my way through all the individual grapes. I got lost a few times! I decided to have the left middle of the painting be the focal point and left much of the middle and right side very loose.

I took a couple shots to decide on a composition and did one shot in black and white.


I got started:


This photo shows the correct colors
I'm pretty happy with the end result and will leave it as is:
"Many Grapes and One Orange", 11x14, charcoal and conte crayon on PastelMat

Sunday, March 02, 2014

Cows with Big Ears and Funny Legs

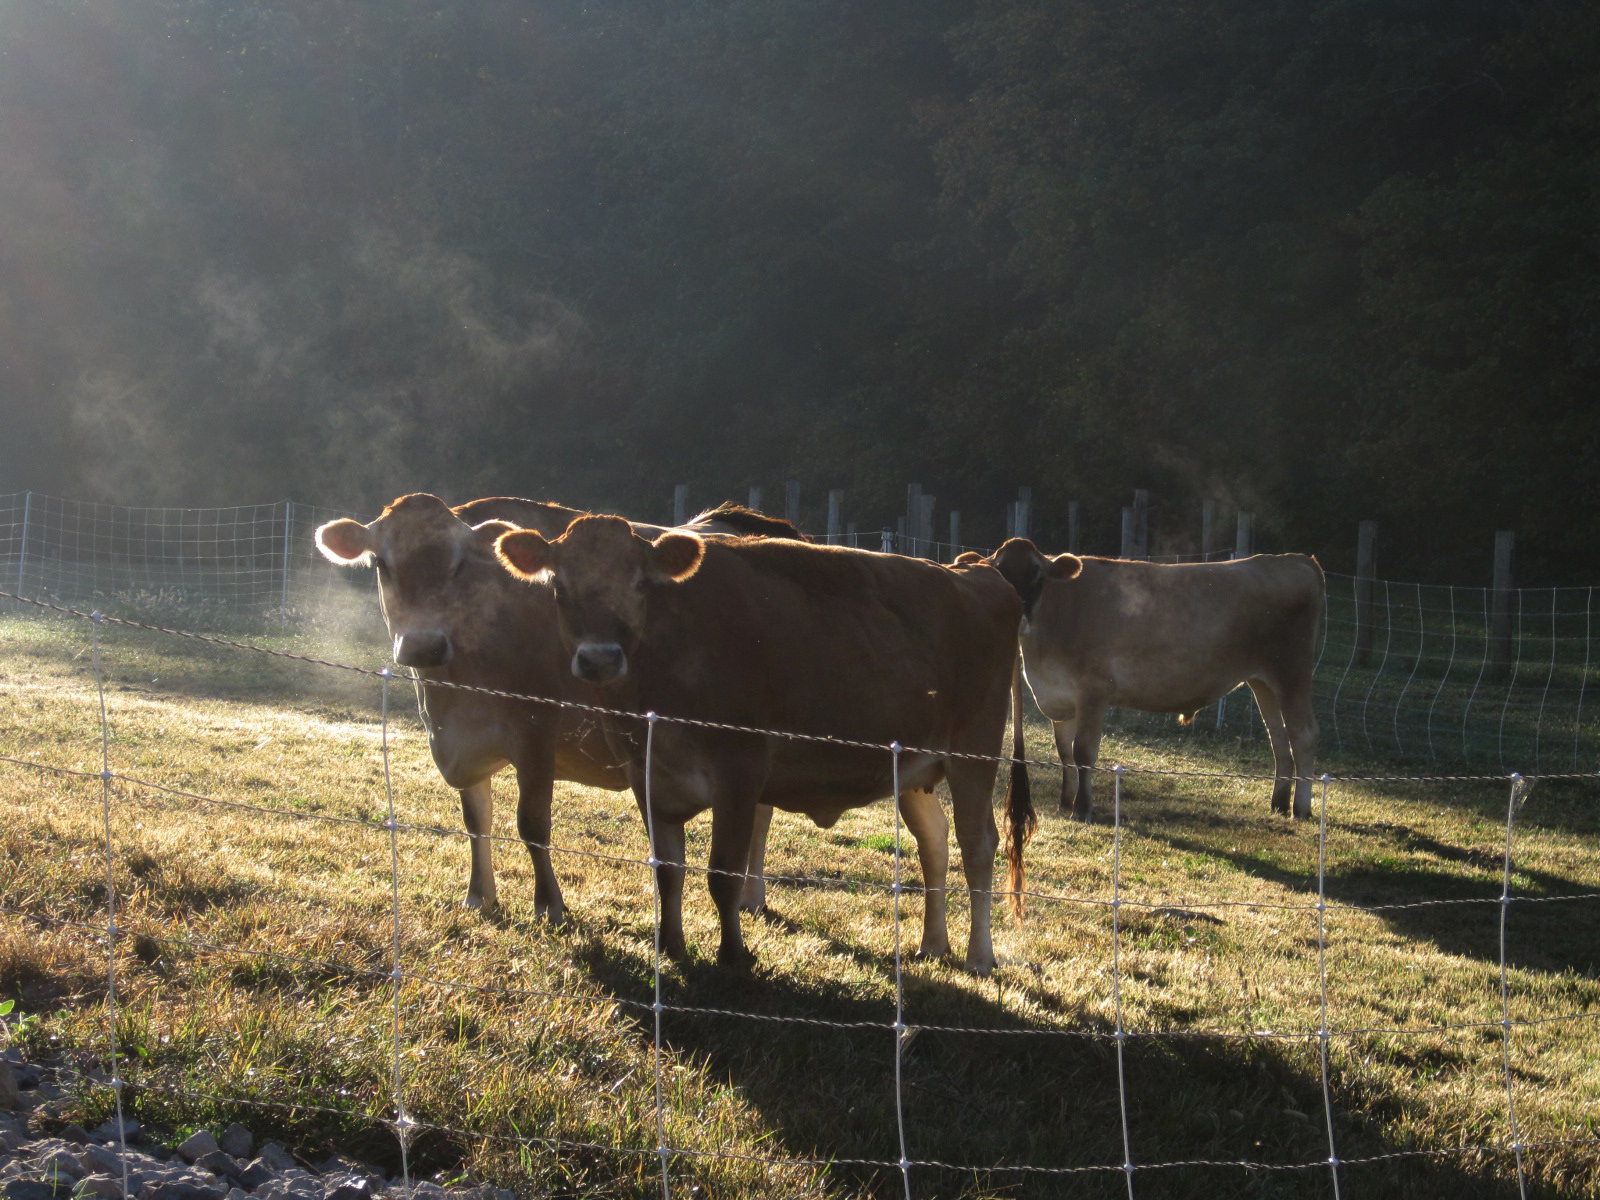
I got back into painting with oils this week. I spent today finishing up a painting of cattle. I took the photo last fall at the Stratford Ecological Farm at their Harvest Festival. Loved the looks and composition of these guys/gals! But when I went to paint them, I noticed how BIG their ears are and how funny cow legs are shaped!
I was hoping to catch the effect of the left most cow's breath in the morning air, but it was hard to capture.

Along the way, I took a few photos with my iPad but I am still trying to figure the best way of getting true colors (warm/cool) and the correct contrast. I have tried to edit them in the iPhoto app, but to me, they are still off. I guess it doesn't matter too much because everyone viewing these has a different monitor. I've tried to use my Canon camera for most and the final photo is from that. Process shots follow:

(iPad photo)


(iPad photo)


"You Looking at Us?", 8x10, oil on hardboard

Sunday, February 16, 2014

Pastel Underpaintings

I wanted to try one of Richard McKinley's underpainting techniques. I used Pastel Multimedia board and added a quick value drawing with a hard pastel. Then brushed on Liquitex clear Gesso on top to seal the drawing and add more grit. It was difficult to brush on the gesso without completely smearing the drawing. Once I had a layer of the wet gesso on, it was easier to get the gesso more level without disturbing the drawing.


After the gesso dried, I put some transparent watercolor. I should have used more pigment as it dried pretty light.
 Then I started layering the pastel. I was having difficulty in getting the pastel to cover the way I wanted and it was just laying on the top of the grit.


 It looked really messy. I finally pressed the loose pigment into the surface using a piece of foam.
I continued on and finally gave up at this stage. Although it doesn't look too bad in the photo, in person, it seemed really messy.

I worked a bit more with a pastel pencil and was happy with the final result. (And everything looks better in a nice mat and frame! haha)

Sunday, February 09, 2014

Studio Work - Home Movies for Reference?

A week or so ago, I found my DVD of some of our family home movies which my father took in the late 1940's and early 1950's. These were originally reel to reel tape, then transferred to VHS, then onto a DVD. I decided to transfer and convert the interesting movies onto my computer to a WMV files. They resolution was really bad (in the original format) and I am sure the multiple conversions really degraded them further.

What I found interesting in the images were some of the compositions and colors. I decided to grab some screen shots and use them for my paintings! The image I chose today, is way before I was born, and I really have no idea where this house is, and I cannot tell who these people are! But the image really spoke to me, so I decided to paint this with pastels in a smaller format. Process shots below:


"The House", 4.5 x 6", pastel on PastelMat

Friday, February 07, 2014

Studio Work - View to the Hills

I finished the piece I started earlier this week tonight. I decided to try framing it directly against the glass, like some pastelists do, to see if I liked it. I'll take it back out of this frame later to see if much pigment stayed on the glass, although I will probably leave it in this frame as I sized the piece for this frame.
"View to the Hills", 6.5" x 12", pastel on 230 grit UArt sanded paper
 Forgive the reflections in the glass below:

Wednesday, February 05, 2014

Snow Day in the Studio

I took a snow day off from work today. This winter continues to be rough. They said on the news that this is #5 in the most snow for January ever. So I spend some time in the studio today.

I was planning on using one of my tiny pastels as a reference, and decided to do an oil wash under painting. I was using a previously gouache toned 230 grit UArt sanded paper. Process shots below. I feel I still need to do something else to the foliage - either soften or go more graphic. I actually like the feel of the trees in photo #5 the best. I will let it sit for a few days before I do more: